Monday, March 28, 2011

Banana Maple Oat Scones Recipe


I found myself, again, at the end of the week with lots of ripe bananas.  I love having this ‘problem’ because it means I can find some fun new recipes to bake to utilize these brown spotted bananas.  A few of my friends and I were going on a road trip to NH for the day and we had to leave early in the morning.  I thought it would be nice to have a little snack for the drive up just in case we got hungry.  I wanted it to fall into the breakfast foods category, and I found these delicious banana maple oat scones. 


They were easy to make and are delicious.  Plus they have a maple glaze.  Who doesn’t love a glaze on anything?  These scones are so crispy out the outside and flaky and soft on the inside.  They worked out perfectly for our road trip up to NH to satisfy our hunger.  They would also be perfect for a brunch or just as a snack with a cup of tea.

Banana Maple Oat Scones Recipe
Recipe from WhipperBerry
Preheat oven to 400o

Banana Maple Oat Scones:
1 ¾ cup All-Purpose Flour
1/2 cup Whole Wheat Flour
1/2 cup Quick-Cooking Oats, plus some for sprinkling
1 Tablespoon Baking Powder
2 Tablespoons granulated sugar
1 Teaspoon Salt
2 Sticks Cold, Unsalted Butter diced
1/4 cup Buttermilk
1/3 Cup Maple Syrup
2 Medium Ripe Bananas, diced in small pieces (the riper the better)
2 Extra- Large eggs, plus one for egg wash(1 egg beaten with 1 Tb. milk)

Glaze:
1 cup powdered sugar
1/3 Cup Pure Maple Syrup
1/2 teaspoon Vanilla Extract 
 
In the bowl of an electric mixer fitted with a paddle attachment, combine the first six ingredients. Add the diced, cold butter and mix on the lowest speed and mix until the butter is in pea-size pieces. Combine the buttermilk, maple syrup and eggs together and add quickly to the flour-and-butter mixture. Add diced bananas and mix until just blended. The dough may be sticky.

Dump the dough out onto a well-floured surface and be sure it is combined. Flour your hands and a rolling pin and roll the dough about 1 inch thick into a circle shape. You should see lumps of butter in the dough. Cut like you would a pizza and make eight pieces. Carefully place on a baking sheet lined with parchment paper.

Brush the tops with egg wash. Bake for 20 to 25 minutes, until the tops are crisp and the insides are done.

To make the glaze, combine the confectioners' sugar, maple syrup and vanilla. When the scones are done, cool for 10 to 15 minutes and drizzle each scone with 1 tablespoon of the glaze. I like to sprinkle some uncooked oats on the top, for garnish. The warmer the scones are when you glaze them, the thinner the glaze will be.

Tips:
      1) My dough was very sticky and I had to keep adding flour into the batter to make it managable to roll out on the counter.  Just add in you flour slowly and keep estimating small amounts at a time until you reach a dough consistancy. 
      2) I used a glass cup dipped into flour to cut my scones.  I wanted them to be a bit smaller than a typical scone.
      3) Definitely check your scones after 20 minutes of cooking.  I didn't and burned a few of my scones.  I thought the burning smell was from some cheese that might have feel to the bottom of the oven from Friday's pizza night.  Opps!  Lesson learned.  We can't have successes all the time or else we wouldn't have anything to learn from. 

Saturday, March 26, 2011

Spinach Gratin Recipe


I am a huge fan of creamed spinach.  I don't have it often, but when I do order it at a steak house it is a splurge.  Honestly, who can resist the creamy sauce baked into each crevasse of the spinach leaves?  You are still getting the benefits of the healthy spinach but just with a non-diet friendly accompaniment of the cream.  But every once in a while it is ok to indulge in something you really enjoy.  Everything in moderation is my motto.    


For my father’s birthday we had a family dinner at my parent’s house.  My mom was making my Dad’s favorite, leg of lamb, so I wanted to make create a side dish that was worthy of this special meal.  After perusing through all of my beautiful Ina Garden cookbooks, I came across the most amazing side dish, spinach gratin.  Heavenly! I had no idea I had one of my favorite restaurant recipes in my collection the entire time.  This could be a little dangerous now that I know how to make this recipe and it is so easy!

My Dad had a very happy birthday with his leg of lamb and spinach gratin. 

Spinach Gratin Recipe
Preheat oven to 425o

4 tablespoons (1/2 stick) unsalted butter
4 cups chopped yellow onions (2 large)
1/4 cup flour
1/4 teaspoon grated nutmeg
1 cup heavy cream
2 cups milk
3 pounds frozen chopped spinach, defrosted (5 (10-ounce) packages)
1 cup freshly grated Parmesan cheese
1 tablespoon salt
1/2 teaspoon freshly ground black pepper
1/2 cup grated Gruyere cheese

Melt the butter in a heavy-bottomed saute pan over medium heat. Add the onions and saute until translucent, about 15 minutes. Add the flour and nutmeg and cook, stirring, for 2 more minutes. Add the cream and milk and cook until thickened. Squeeze as much liquid as possible from the spinach and add the spinach to the sauce. Add 1/2 cup of the Parmesan cheese and mix well.

Season, to taste, with salt and pepper.

Transfer the spinach to a baking dish (9x13) and sprinkle the remaining 1/2 cup Parmesan and the Gruyere on top. Bake for 20 minutes until hot and bubbly. Serve hot.

Tips:
        1) If you don't want to use the cream, you could substitute milk
        2) I use my fine mesh strainer over a bowl to squeeze out the liquid from the spinach.  By using the back of a spoon you can push the water through the strainer and away from the spinach easily. 

Saturday, March 19, 2011

Favorite Kitchen Tools

When I am in the kitchen, I have realized that I have my go-to kitchen tools that help me to accomplish any type of cooking/baking task.  Below is a list of tools that I feel are important and think any amateur cooks would appreciate having.


Immersion Blender
KitchenAid Immersion Blender
My immersion blender gets so much more use than I ever thought.  I received this as a birthday gift and instantly fell in love with this powerful little red appliance.  The immersion blender is great for:
1.       Thickening soups
2.       Making smoothies
3.       Mixing ice based drinks
4.       As a substitute for a food processor or blender (if what you are blending is a smaller quantity)

Slow Cooker
Slow Cooker
Hello my friend!  The slow cooker is such an amazing invention.  Who doesn’t love walking through your front door after work and smelling a ready to eat home cooked meal (and no, you don’t have a personal chief doing all of the work).  This little wonder allows you to throw together a soup, roast, chili, dessert, appetizer, the options are endless.  You can just set the timer on the slow cooker to start while you are at work, then when you are ready to eat it is waiting for you!  Plus this one pot wonder means less clean up! Who doesn’t love that?

KitchenAid Artisan Stand Mixer

KitchenAid Artisan Stand Mixer

This stand up mixer stands mighty on your countertops.  This beauty truly is worth every penny spent on her.  I use this mixer for everything that needs mixing.   It is so great to turn it on to cream together butter and sugar while I am gathering the rest of my ingredients and starting on the next step.  It allows me to keep moving on with the recipe and save time in the end.  The stand mixer has so many capabilities with the paddle, whisk and dough hook attachments.  I am making muffins, cakes, whipped cream, pizza dough, you name it, and I can do it with this mixer! Thank you KitchenAid for this product!

Fine Mesh Strainer

Fine Mesh Strainer
A fine mesh strainer is a great tool to have in your kitchen. I give mine multiple purposes to save on having to buy other types of products.  I, obviously, use it as a strainer to strain finer foods that can easily slip through the larger wholes of a standard strainer.  But I also use it as a sifter for dry ingredients while baking.  No need to have a specific tool for every action if you can repurpose some tools for multiple processes.  This will save you money and space in your kitchen.

Mixing Bowls
Parker Bowl Set
I love nested mixing bowls.  They give you lots of sizes for all different types of uses.  I received these Crate & Barrel Parker Bowls as a gift from my aunt and I love their vibrant colors.  I use these for everything from mixing to serving.  They look great and are so fun to use.  I am using these every day.   The small one is great to serve a dip in and then use the larger bowl to serve the chips.  The colors coordinate and make for a very fun presentation.   

Rubber Spatula
Rubber Spatula

I have lots of spatulas in my kitchen.  I am always using them to scrap down the side of a mixing bowl to ensure everything is incorporating together or scraping out a pot of mashed potatoes into a serving bowl.  These are great to make sure you aren’t leaving anything behind.  They have high heat tolerance so you can use them while cooking too for stirring rice, couscous, vegetables, etc. 

Baking Sheets

Nonstick Baking Sheets
Baking sheets are a very helpful tool to have in your kitchen tools collection.  They are very useful for baking cookies, but they have many other uses.
1.       Roasting vegetables
2.       Making baked quesadillas
3.       Baked French fries
4.       Reheating leftovers to bring their crunch back

I hope that you find this helpful.  These are definitely my go-to items in my kitchen that I don’t think I could function in the kitchen without. 

What are you favorite kitchen tools?

Friday, March 18, 2011

Beer Margaritas


Today was a beautiful Friday in Massachusetts!  The temperature was perfect in the mid 60’s.  Even though we have a ways to go until the summer, I am feeling the warm weather spirit all around.  Nothing feels more like the summer than margaritas, beer margaritas that is!

Beer margaritas you ask? Oh yes, you heard me correctly.  They are amazing.  We were first introduced to them on a trip to California visiting with family, and couldn’t wait to get back to share the news with everyone back here.  We have made them for weekend getaways with friends in New Hampshire, family vacations in Maine, and of course in our backyard by the fire pit.  Everyone we make them for always gives us that look of confusion, but once they take their first sip they are in margarita heaven.

They are so simple to make at home and there is no need to go out to the local Mexican restaurant to fill your margarita void.  I guarantee these will be cheaper than the restaurant and much more fun! Have your own Mexican themed evening and make your favorite Mexican meal to go along with the tangy lime deliciousness of these margaritas. 


Beer Margaritas Recipe

1 frozen limeade concentrate
2 bottles Corona
1 cup of tequila
Limes
Rimming Salt (optional)

To a large pitcher add the limeade, Corona and tequila.  Mix well with a wooden spoon until the limeade has dissolved into the other liquids. 

If you prefer your margarita with salt on the rim, no problem.   Just cut the lime into wedges.  Take a wedge and circle it around the rim of the glass allowing for a lime juice covered rim to allow the salt to adhere to the glass.  Typically rimming salt comes in a container with high sides allowing for you to just dunk your glass upside down into the salt.

Next, pour the margarita mixture into individual glasses and garnish with a lime wedge, and enjoy!  Put on some Jimmy Buffet, get a bowl of chips and salsa and relax.

Our ‘New’ Kitchen


When we bought our home we instantly fell in love with the kitchen!  The house was only 2 years old and had all of the upgrades that we dreamed about but didn’t think were possible in our first home.  We felt so lucky and I instantly began to promise homemade dinners and many baked goods to my husband.

After about a year of living in the house, still in love with the kitchen, we decided to give it a little pizzazz.  Our first DIY home improvement project, hooray!  The kitchen already had some funky red pendant drop lights, black granite counter tops, stainless steel appliances, but no tile backsplash.   So our mission was to find some complementary tiles that would add a new element of fun and stimulation to our kitchen.   We are head over heels for glass mosaic tiles (in the photo above) with their modern, yet warm feel.  So we bought all of the supplies and drove home very excited, but SUPER nervous.  We had never done anything like this before.  This was in 2009.  Now fast forward to March of 2011, we finally completed our project! Yay us! We procrastinated on this project due to our nervousness; we didn’t want to ruin our kitchen.  But now that this project was a beautiful success,   I am ready for lots more cooking and lots more home improvement projects.

Ok, ok….enough with the suspense and my boring explanation...here is the before photo of the kitchen. Yes, she is beautiful, but with the new face lift, it brings her to a whole new level.


And the after….


I am in love with the single row of tiles along the window.  It is just adorable and I get to look at it every time I wash the dishes!


This new kitchen is giving me a whole new inspiration to my cooking.  I have always been passionate about cooking before, but now I find myself never wanting to leave the kitchen.  I always want to be in there whipping up something delicious (yum… that just made me think of homemade whipped cream),  even after a long day at work when all I want to do is order some take out. 

Here are a few things that help to keep me encouraged, motivated and determined to create a homemade meal for much less money than going out to eat.
1.        I always turn music on.  We have an iPod player in our kitchen and music keeps me dancing and singing around the kitchen while I am working away.  The time goes by so much faster, especially when you are singing along with Journey’s “Don’t Stop Believin”
2.       Look for flower sales.  I love to have fresh cut flowers in my kitchen.   They are so cheerful, beautiful and fragrant.  I definitely don’t spend a lot of money on flowers, but during the long winter months of New England it is always nice to have a touch of spring.  You can see I have some daffodils in my kitchen now.   At my local grocery store they were 2 bunches of 10 stems for $3.  I couldn’t resist. 
3.       Keep your favorite cooking utensils and electronics in a central location around where you tend to prep all of your food.  This makes cooking much easier if you keep your cutting knives in the drawer next to where you are always cutting up your veggies, fruit, etc.  It took us a while to understand how we use our kitchen, but after we made a few tweaks to where we stored everything, the flow made much more sense and we didn’t find ourselves constantly walking around to get everything we needed.

And I leave you without a recipe today, but with this gem instead…


Thursday, March 17, 2011

Irish Soda Bread Recipe


Happy St. Patrick's Day! 

This is such a fun holiday to celebrate, if you are Irish or not.  Who doesn't love green beer, good times with friends, 4 leaf clovers, corned beef & cabbage, and Irish soda bread!  In the spirit of the holiday, I baked a lovely Irish soda bread.  I love the dense, chewy center with sweet raisins and crispy outside.  It is a
delectable combination
Growing up a family friend always made us a huge round loaf of Irish soda bread for St. Patrick's day.  My mom, sister and I loved to have a slice of it toasted up with butter and a cup of tea.  It was such a special treat to have after a day at school.  Since I made this loaf, I have been enjoying that same tradition (after work) with my husband.
Ready for the oven!  I don't have a cast iron pan, so I used a glass pie dish and I think it worked out just fine.  You just need to improvise, sometimes it work, and sometimes it doesn't.  That is the fun of experimenting in the kitchen. 
Here is my bread dough, ready for the oven.  Oh how beautiful!

Here is an interesting article about Irish soda bread on Today msnbc.  I prefer my Irish soda bread without caraway seeds, but if you like them, add them in! 


Irish Soda Bread Recipe
Recipe from Simply Recipes
Preheat oven to 425o

4 to 4 1/2 cups flour
2 Tbsp sugar
1 teaspoon salt
1 teaspoon baking soda
4 Tbsp butter, cubed
1 cup raisins
1 large egg, lightly beaten
1 3/4 cups buttermilk

In a large mixing bowl, whisk together 4 cups of flour, sugar, salt and baking soda.

Next, work the cubed butter into the flour mixture with your hands, pastry cutter or two knives.  Work the butter in until the mixture resembles a coarse meal.  Add raisins.

Create a well in the center of the flour mixture and add beaten egg and buttermilk.  Incorporate well with a spoon or spatula until the dough becomes stiff.  Dust your hands with flour and knead the dough in the bowl just long enough to form a ball.  My dough was very sticky and I needed to add more flour at this point. 

Move the dough to a floured surface and shape into a round loaf.  Note that the dough will be a little sticky, and quite shaggy (a little like a shortcake biscuit dough). You want to work it just enough so that the flour is just moistened and the dough just barely comes together. Shaggy is good.

Place the dough into a greased, round pie dish, cast iron skillet or a baking sheet.  Using a knife, score an "X" on the top of the dough about an inch deep. 

Bake the bread for 35-45 minutes.  Check the bread with a long skewer, if it comes out clean then your bread is done.  Allow the bread to cool in the pan for 10 minutes.  Then remove the bread and place it on a cooling rack. 

Serve warm and enjoy!

Tips:
        1) If you enjoy your Irish Soda bread with caraway seeds, feel free to add some to this recipe
        2) If towards the end of the baking process the bread is getting too brown, cover it with tin foil to finish baking off.
        3) 1 cup of buttermilk = 1 tablespoon of white vinegar + 1 cup of milk (this recipe calls for 1 3/4 cups buttermilk, so I estimated 1 3/4 tablespoons of vinegar and filled the rest of my measuring cup with milk to get to 1 3/4 cups)

Wednesday, March 16, 2011

Red Velvet Cupcakes


Bright, bold and beautiful!

This weekend my husband and I decided to add a tile backsplash to our kitchen (more on this in a future post).  This was a very big project for us, as we have never done any type of home improvement project, so I was inspired to bake something that made a statement.  What better than gorgeous red velvet cupcakes with cream cheese frosting?!?! Delicious!


I love the radiant red color of these cupcakes with the soft white frosting on top! They are truly a piece of artwork.  The subtle chocolate undertones with the tangy cream cheese frosting give your taste buds an experience they will never forget. 


Red Velvet Cupcakes Recipe
Recipe from Pinch My Salt
Makes 20-24 cupcakes
Preheat oven to 350o

Cupcakes:
2 1/2 cups sifted cake flour
1 teaspoon baking powder
1 teaspoon salt
2 tablespoons unsweetened cocoa powder
2 oz. red food coloring
1/2 cup unsalted butter, softened
1 1/2 cups sugar
2 eggs, at room temperature
1 teaspoon vanilla extract
1 cup buttermilk, at room temperature
1 teaspoon white vinegar
1 teaspoon baking soda

Cream Cheese Frosting:
16 oz. cream cheese (2 packages), softened
1/2 cup unsalted butter (one stick), softened
1 teaspoon vanilla extract
2 1/2 cups powdered sugar, sifted
pinch of salt

Preheat oven to 350o. Line two 12-cup muffin tins with cupcake papers.

In a medium bowl, sift together the flour, baking soda, and salt.  Set this aside for later use.

Then, in a small bowl mix the red food coloring and cocoa powder with a fork.  This will form a thin paste.  Mix well until there are no lumps.  Set this aside. 

In a large bowl, using a hand mixer or stand mixer, beat butter and sugar together until light and fluffy, about three minutes.  Beat in eggs, one at a time, then beat in vanilla and the red cocoa paste, scraping down the bowl with a spatula as you go. 

Once the batter is a beautiful red color begin to add a third of the flour mixture.  Beat well and then add half of the buttermilk.  Once the buttermilk is incorporated add another third of the flour mixture, followed by the remaining buttermilk.  Once integrated, finish mixing in the remaining flour mixture.  Through this process make sure you scrape down the sides of the bowl with a spatula. 

Next, mix together vinegar and baking soda in a small bowl (I did this in the small bowl I used for the food coloring/cocoa combination to gather any last bits of red coloring I missed)  This will fizz and look like a science experiment, don’t worry!  Add the vinegar mixture to the cake batter and stir well to combine. Scoop the cake batter into the cupcake cups filling 2/3 – 3/4 full. 

Bake for approximately 20-22 minutes, rotating pans halfway through. Cupcakes are done when a toothpick inserted in the center comes out clean. Don’t forget to check your cupcakes towards the end of the baking process to not over bake. 

To make the frosting, use an electric mixer to combine the cream cheese and butter.  Next, turn the mixer to low and slowly add in the powdered sugar, salt and vanilla extract.  Once the powdered sugar is incorporated turn mixer to high speed and beat until it is light and fluffy.  If you aren’t using the frosting right away, you can place it in the refrigerator until you are ready to frost the cupcakes. 

Cool the cupcakes in their tins on a wire rack for about 10 minutes, then remove and allow to cool completely before frosting. 

Tips:
1)      Wear an apron while making these as the food coloring can stain your clothing
2)      1 cup of buttermilk = 1 tablespoon of white vinegar + 1 cup of milk


Sunday, March 13, 2011

Spicy Lime Fish Tacos


When I go on vacation, I love to try all of the local foods.  Learning about the different flavors, spices, produce, proteins, fish, etc is always something I love to do.  I am a foodie and this is a very exciting part of all of my vacations!  Like having raw squid in Japan, opakapaka in Hawaii, or ice wine in Canada.

My husband and I honeymooned in Hawaii and every day we made sure to eat fish.  It was so fresh and absolutely delicious.  Many times for lunch we would get fish tacos.  The combination of the fresh fish, soft taco shell, fresh salsas, sauces and toppings were outstanding and every shop we went to had a different spin on their culinary approach.

When we got back home from our trip, we were in serious withdrawal from fish tacos.  I was on the hunt to find an amazing recipe and came across this one.  It has fulfilled all of our expectations.  Having these bring us right back to the sandy beaches of Hawaii, even though there is still a lot of snow on the ground here in Massachusetts.  This is why I love food, it can foster up so many amazing memories. 

Spicy Lime Fish Tacos
Recipe from Love & Olive Oil
Serves 4

For the Sauce:
1 cup plain yogurt
1 lime, juiced
1/2 teaspoon cumin
1/4 teaspoon cayenne pepper
1/2 cup cilantro, chopped
1 teaspoon honey

For the Fish:
1 lime, juiced
3 tablespoons honey
1 teaspoon cumin
1/2 teaspoon cayenne pepper
salt and pepper, to taste
1 cup flour
2 4-6oz. mahi mahi fillets, sliced into 1/2 thick pieces
vegetable oil

1 cup cabbage, any color, shredded
Small flour tortillas
Chopped cilantro, lime wedges, and sliced green onions for garnish.

Directions
Combine all sauce ingredients in a small bowl and set aside.

In a second bowl, stir together lime juice, honey, and spices for the fish. Add fish pieces and toss to coat. Let marinate for at least 10-15 minutes.  Take fish out of marinade and lightly toss in flour. Shake off excess.

Heat a few tablespoons oil in a large skillet. Add coated fish pieces to hot oil and cook until golden and cooked through, about 2-3 minutes per side (Note that this will vary depending on how thick your fish pieces are).

Heat tortillas in a small pan until warm and bubbly. Keep in a warm oven until ready to serve. Top with fish, cabbage, cilantro, green onion, and yogurt sauce.  Enjoy!

Saturday, March 12, 2011

Homemade Pizza Dough


Friday night is homemade pizza night at my house!  When I get home from work on Fridays, I head straight into the kitchen to make the pizza dough to allow time for it to rise.  Making your own pizza is so much fun and you can add any type of toppings you like.  We usually make a 'kitchen sink' pizza.  We take all of the vegetables that we didn't use up through the week and use those as toppings for our pizza.  The picture above has red peppers, but we love to add spinach, asparagus, herbs, tomatoes, broccoli, anything you can think of! Even if we have leftover meats like chicken, turkey, sausage, cold cuts, etc, they go on there too! It is so much fun to experiment with all of the endless options you can create.  Plus, you aren't wasting any of the produce you bought during the week. 


Making your own dough is very simple and just takes a few steps that are fast.  To this dough recipe I like to add spices to give the pizza an added layer of flavor.  You can add garlic powder, Italian seasoning, basil, oregano or any other spices you enjoy. 

Pizza Dough Recipe
Makes 2

3 1/2 - 4 cups flour
1 teaspoon sugar
1 envelope instant dry yeast
2 teaspoon kosher salt
1 1/2 cups warm water
2 tablespoons olive oil

You can make the dough in either a food processor or a stand up mixer fixed with a dough hook.  Mix the flour, sugar, salt and yeast together.  If you wish to add some additional spices to the dough, as I mentioned above, you would do that at this time.  While mixing/processing stream in warm water and olive oil until dough forms a ball.  If the dough is sticky add a tablespoon of flour at a time until a solid ball is formed.

Knead the dough until smooth on a floured surface.  Grease a large bowl with 2 teaspoons of olive oil and place the ball of dough in the bowl.  Cover the bowl and allow to rise for 1 hour.  Once the dough has risen, place the ball of dough on a floured surface and divide into 2 pieces.  Cover with a towl and allow to rest for another 10 minutes.  Then roll out your dough for your pizza and have fun with your toppings! 

What are your favorite toppings??

Tips:
     1)  When making this dough I like to use half whole wheat flour and half white flour.  This adds a lot of flavor to the dough.
     2)  Don't forget to add some additional spices to do the dough if you would like.  I usually don't measure them out, I just sprinkle them in and look for an even distribution through the dough.  If you want a bit more then knead some more in. 
   

Thursday, March 10, 2011

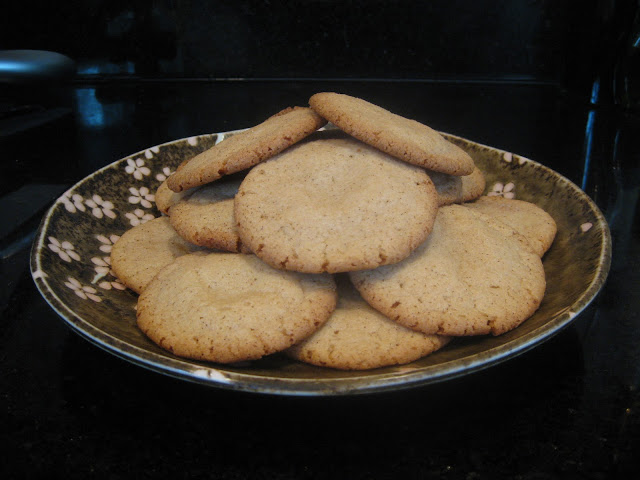
Snickerdoodles


Crispy on the outside, soft and chewy on the inside, these snickerdoodles are fantastic.

I love to bake cookies.  They bake quickly and you have instant satisifaction.  Baking cookies makes your entire home smell like a bakery and brings you back to your childhood.  These cookies are rolled in a cinnamon sugar mixture before they are baked in the oven making it fun for everyone to get involved with this labor of love.

Here they are all rolled in cinnamon sugar, lined up like little soldiers and ready to be baked!


Cooked to perfection!


Snickerdoodles Recipe
Recipe from Cooking Light

Preheat oven to 400o

3/4  cup  granulated sugar
2/3  cup  light brown sugar
1/2  cup  butter, softened
1  teaspoon  vanilla extract
1  large egg
1 1/2  cups  all-purpose flour (about 6 3/4 ounces)
1  teaspoon  baking powder
1/2  teaspoon  ground cinnamon
1/4  teaspoon  salt
1/3  cup  granulated sugar
1 1/2  teaspoons  ground cinnamon
Cooking spray


Combine 3/4 cup granulated sugar, brown sugar, and butter in a medium bowl; beat with a mixer at medium speed until light and fluffy. Beat in vanilla and egg.

Lightly spoon flour into dry measuring cups; level with a knife. Combine flour, baking powder, 1/2 teaspoon cinnamon, and salt, stirring well with a whisk. Add flour mixture to butter mixture; beat just until combined.

Shape dough into 30 balls.

Combine 1/3 cup granulated sugar and 1 1/2 teaspoons cinnamon in a small shallow dish. Roll balls in sugar mixture, and place 2 inches apart on baking sheets coated with cooking spray. Bake at 400° for 8 minutes or until tops crack. Cool on pans 1 minute. Remove from pans; cool on a wire rack.

Hope you enjoy! What are your favorite cookies to bake?

Tuesday, March 8, 2011

Taco Soup


As promised, here is a recipe that we love to make with our leftover roast chicken, taco soup!  It is simple, fast, and packed full of flavor.  This is such a great way to make a healthy, hearty meal on a weeknight with very little effort.  This recipe has very little preperation and there is no waste with multiple pots and pans used.  I find it so satisfying to be able to throw everything into one pot and have the ingredients meld together on their own and create pure scrumptiousness.

This soup focuses more on the delicious ingredients and has just enough broth to cover everything.  With a kick of heat, it is accompanied by the smooth texture of the beans and crispy corn.  There is a lot going on with this soup and it stimulates your senses.   

Taco Soup Recipe
Serves 5

1 pound roasted chicken
1 packet taco seasoning mix
1 packet ranch dressing mix
15 oz. can pinto beans
15 oz. can kidney beans
15 oz. can corn
2 (10 oz.) cans Rotel tomatoes
1 red bell pepper, chopped

Add all ingredients listed above into a large soup pot.  Mix well so everything is coated with the taco seasoning and ranch dressing mix.  Simmer the soup over medium-low heat until bubbly. 

Serve soup with grated chedder cheese and tortilla chips. Enjoy!

Tips:
      1)  This soup freezes very well if you have leftovers. 
      2)  Rotel tomatoes have different options for heat levels, so you can customize this soup to your own personal heat specifications. 

What are your favorite dishes to make with leftover roast chicken?

Monday, March 7, 2011

Pecan-Topped Pumpkin Bread


I live in New England and Spring is fast approaching (hopefully!), so I was in the mood to bake for the last time this winter with pumpkin.  I needed to get my pumpkin fix in before the warm weather arrives.  This bread is so moist and delicious.  The recipe makes two loaves which is a treat because you are still putting in the same effort and time for baking one loaf, but you get the added bonus of two!  You can freeze the second bread or bring it to a friend as a gift.  We had made plans to get together with my sister and brother-in-law, so we brought our extra pumpkin bread down as a surprise to them.  I hope they are enjoying it now.

This bread has a soft and airy center with a crunchy baked top garnished with nuts.  It is the perfect mix of textures.  The pumpkin and cinnamon flavors will warm you up.  I had mine with a cup of tea and it was a match made in heaven. 

Pecan-Topped Pumpkin Bread Recipe
Recipe from Cooking Light

Preheat oven to 350o

3 1/3  cups  all-purpose flour
1  tablespoon  baking powder
2  teaspoons  baking soda
1  teaspoon  salt
1  teaspoon  ground cinnamon
1  teaspoon  ground nutmeg
1/2  teaspoon  ground allspice
2  cups  granulated sugar
1/2  cup  egg substitute
1/2  cup  canola oil
1/2  cup  low-fat buttermilk
2  large eggs
2/3  cup  water
1  (15-ounce) can pumpkin
Cooking spray
1/3  cup  chopped pecans

Lightly spoon flour into dry measuring cups; level with a knife. Combine flour and next 6 ingredients (through allspice) in a bowl.

Place sugar, egg substitute, oil, buttermilk, and eggs in a large bowl; beat with a mixer at high speed until well blended. Add 2/3 cup water and pumpkin, beating at low speed until blended. Add flour mixture to pumpkin mixture, beating at low speed just until combined. Spoon batter into 2 (9 x 5-inch) loaf pans coated with cooking spray. Sprinkle pecans evenly over batter. Bake at 350° for 1 hour or until a wooden pick inserted in center comes out clean. Cool 10 minutes in pans on a wire rack; remove from pans. Cool completely on wire rack.

Tips:
      1) Don't have egg substitute in the house? No need to run out to the grocery store.  1/2 cup of egg substitute = 2 large eggs
      2)  I didn't have pecans in the house at the time I baked this delicious bread, so instead I topped it with chopped walnuts.
      3) I never buy buttermilk when a recipe calls for it.  It is very simple to make your own with milk and white vinegar.  1/2 cup of buttermilk = 1/2 of milk mixed with 1 1/2 teaspoons of white vinegar and let stand for 5 minutes.
     4) This is also delicious grilled up on a frying pan with a little butter.  It makes it toasted and crunchy on the edges and so warm and sweet on the inside.

Sunday, March 6, 2011

Sunday Dinner: Roast Chicken


Sunday dinners are a wonderful way to end the weekend.  I love to make a large Sunday dinner, even if it is only for my husband and me.  It is a great way to get a bit of the prep out of the way for some of your midweek meals after work.  

My mother would always make a large Sunday meal for my family with all of the fixings.  It was such a fun time to sit at the dinner table and have some quality family time.  I love to do this with my husband and look forward to doing it with our family some day. 

Today for Sunday dinner I made a roast chicken with some delicious sides; stuffing, mashed potatoes, fresh green beans and gravy.  When I am at the grocery store, I always look for the largest roasting chicken I can find.  I figured, it doesn't matter if I am roasting a 3 lb. chicken or an 8 lb. chicken, I am still going through the effort of roasting it.  This way with the larger bird, I am guaranteed to have lots of leftovers to help me prepare for the busy work week ahead.    The options are endless when it comes to what you can do with roasted chicken.  Stay tuned to the blog later this week to see what I do with some of the leftovers. 

Roasting a chicken is so easy.  It seems a bit intimidating at first if you have never done it before, but trust me, it is simple!


Roast Chicken
Preheat oven 350o

Roasting chicken
Salt
Pepper

Remove the chicken from the plastic bag and also remove the bag of giblets from the cavity of the chicken.  Rinse the chicken in cold water and pat dry with a paper towel.  Place the chicken breast side up in a roasting rack inside a baking pan with tall sides.  Salt and pepper the bird along the top and inside the cavity. 

Roast the chicken for 20 minutes per pound.  The juices should run clear when a knife is inserted between the body and thigh of the chicken.  The meat thermometer should also read 165 degrees. 

Once out of the oven, cover the chicken with foil and allow to rest for 10 minutes.  This will allow all of the juices to seal in before you begin carving.

Tips:
      1)  Once you have enjoyed your Sunday dinner and are cleaning up, remove all of the remaining meat from the chicken.  Depending on what your plans are for your leftovers, you can put some of the leftover chicken in a sealed plastic bag and freeze it until you are ready to use it!
  
Related Posts Plugin for WordPress, Blogger...